How to Properly Knock-In a New Cricket Bat (USA Guide)
Buying a brand-new cricket bat is exciting — especially when it’s premium English willow. But before you take it to a league match in Texas, New York, or California, there’s one essential step you can’t skip: knocking-in.
If you want your bat to last longer, perform better, and avoid cracks, here’s a complete USA-friendly guide to knocking-in your cricket bat the right way.
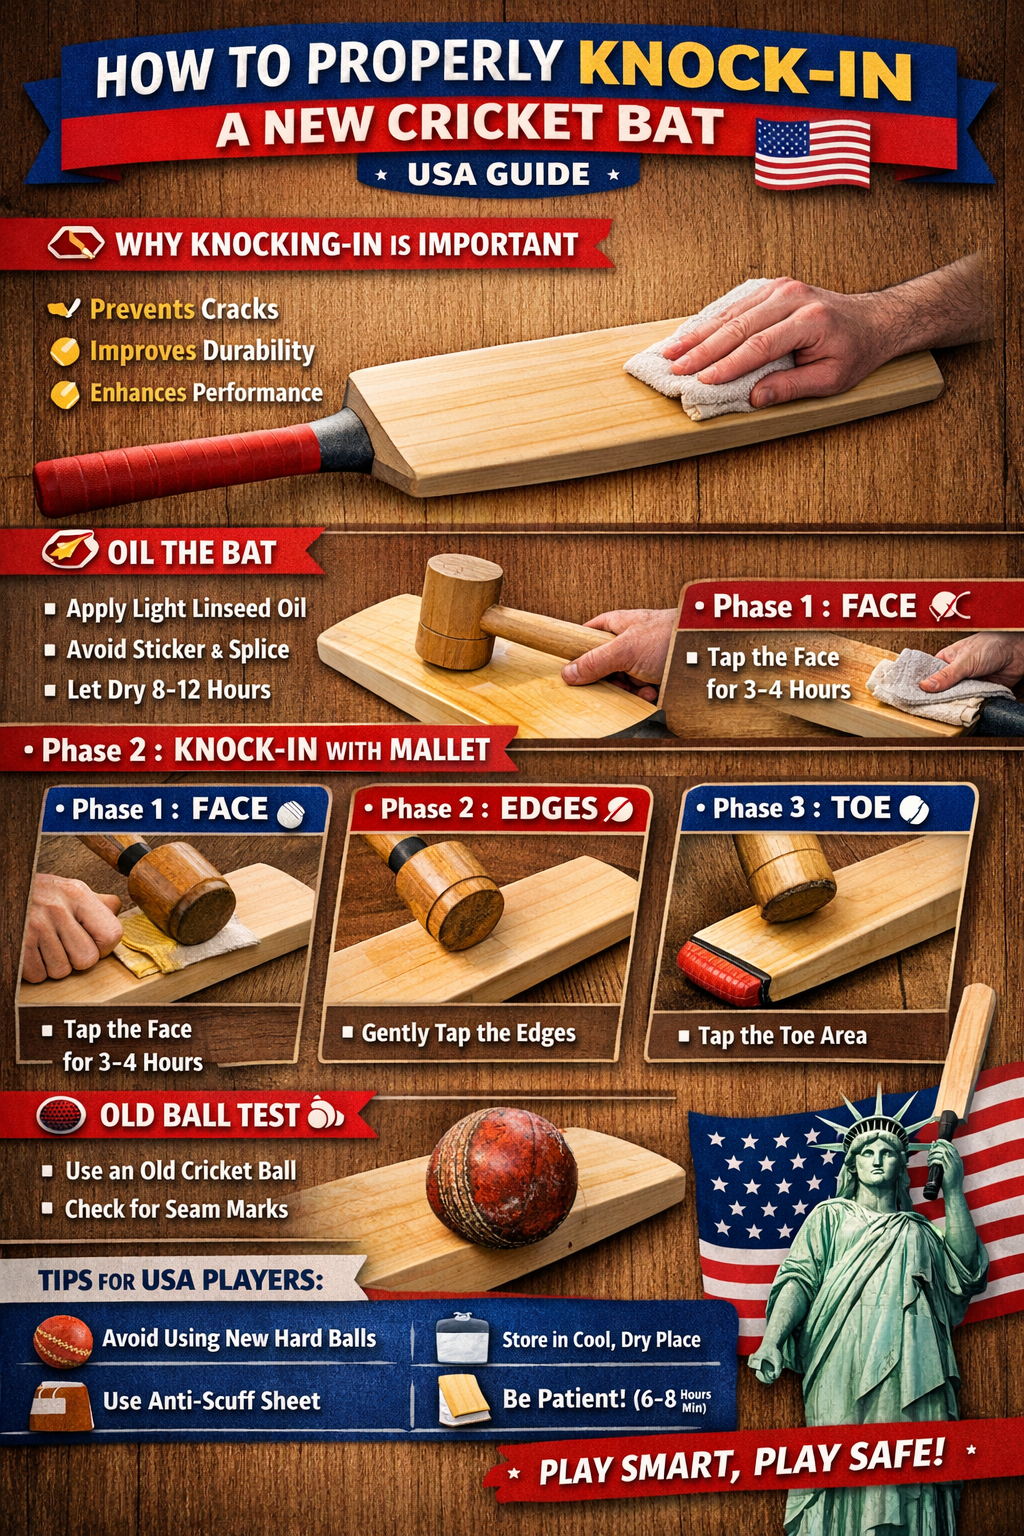
Why Knocking-In Is Important
Most English willow bats from brands like SG, SS, and Kookaburra are partially prepared, not match-ready.
Knocking-in:
-
Compresses the willow fibers
-
Reduces the risk of cracks
-
Improves durability
-
Enhances stroke play
-
Extends bat lifespan
Skipping this process is one of the biggest mistakes players make — especially newer cricketers in the growing USA cricket scene.
What You Need to Knock-In a Bat
You’ll need:
-
A wooden bat mallet (preferred)
-
An old cricket ball (for final stage)
-
Linseed oil (raw, not boiled)
-
A clean cloth
-
Patience (very important!)
Step 1: Apply Light Oil (If Needed)
Some bats come pre-oiled. If yours isn’t:
-
Apply a small amount of raw linseed oil to the face, edges, and toe.
-
Use a soft cloth.
-
Avoid the splice and stickers.
-
Let it rest horizontally for 8–12 hours.
Do NOT over-oil. Too much oil can damage the bat and make it heavy.
In dry U.S. climates like Arizona or Nevada, light oiling is especially important because willow can dry out faster.
Step 2: Start Knocking-In (Main Process)
Phase 1: Face of the Bat (3–4 Hours Total)
-
Use a wooden mallet.
-
Gently tap the face — not too hard.
-
Gradually increase force over time.
-
Focus more on the middle and sweet spot.
You should hear a solid sound develop as fibers compress.
Phase 2: Edges (Very Important!)
-
Hold the bat at a slight angle.
-
Gently tap the edges.
-
DO NOT hit directly at 90 degrees.
-
Avoid striking too hard — edges are most vulnerable.
Most cracks in USA leagues happen because players ignore edge preparation.
Phase 3: Toe Protection
-
Lightly tap the toe area.
-
Consider applying a toe guard if playing on matting wickets common in U.S. club cricket.
Step 3: Old Ball Test (1–2 Hours)
After 5–6 hours of mallet knocking:
-
Use an old cricket ball.
-
Throw it underarm onto the bat face.
-
Check for seam marks or deep indentations.
If seam marks are deep → continue knocking-in.
If marks are shallow → your bat is nearly match-ready.
How Long Does It Take?
Total knocking-in time:
6–8 hours minimum
Some high-grade English willow bats may require up to 10 hours.
There are also bat knocking-in machines available at specialty cricket stores across the U.S., which can speed up the process.
Common Mistakes to Avoid
Using a new hard ball too early
Over-oiling the bat
Ignoring the edges
Rushing the process
Playing league matches without preparation
Remember — replacing a cracked bat is far more expensive than spending a few hours preparing it.
Extra Tips for USA Cricketers
-
Indoor winter leagues (harder balls, synthetic surfaces) require extra preparation.
-
Store your bat in a cool, dry place.
-
Avoid leaving it in a car (extreme U.S. weather can damage willow).
-
Always use anti-scuff sheets for extra protection.
Final Thoughts
Knocking-in isn’t just tradition — it’s essential bat care.
Whether you’re playing weekend cricket in New Jersey, T20 tournaments in California, or league matches in Texas, a properly prepared bat will give you confidence at the crease and protect your investment.
Take the time now, and your bat will reward you all season long.